Device Management
The Device Management feature allows users to perform specific actions on paired devices in the Zennio Remote application. Below are detailed the functions and options available through the Management Menu.
Device Info
The Device Info window displays the technical details and operational status of the selected device. The available fields vary depending on the device’s status:
| Field | Description |
|---|---|
| Device type | Model of the device. |
| Serial number | Unique identifier assigned to the device. |
| KNX address | Physical KNX address configured in ETS. |
| Licenses | Active licenses available. |
| ETS | Version of ETS used for configuration. |
| IP | IP address of the device. |
| KNX bus status | Indicates whether the device is connected to the KNX bus. |
| PAK | Installed firmware version. |
| Pairing | Date and time when pairing was initiated. |
| Last used | Date and time of the last connection or use. |
| Webserver Tools | Allows opening the device’s web tools in the browser. |
- The IP field and the Webserver Tools option are only available from device version 4.3 onwards.
- To access Webserver Tools, they must be enabled in the device configuration and the device must be on the same network as the user’s computer.
- If the device is in pending pairing status, the displayed information will be partial.
In this case, only the Serial number, Created on, and Last used fields will be shown until pairing is completed and the device communicates with the system for the first time. - If the device has no connection , the KNX bus status field will not be displayed.
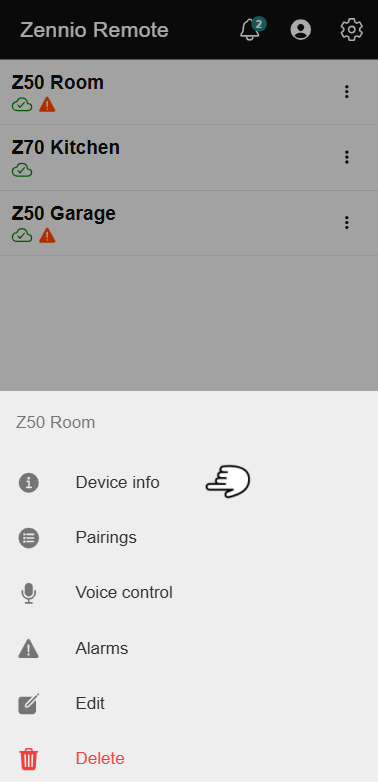
Accessing Device Info
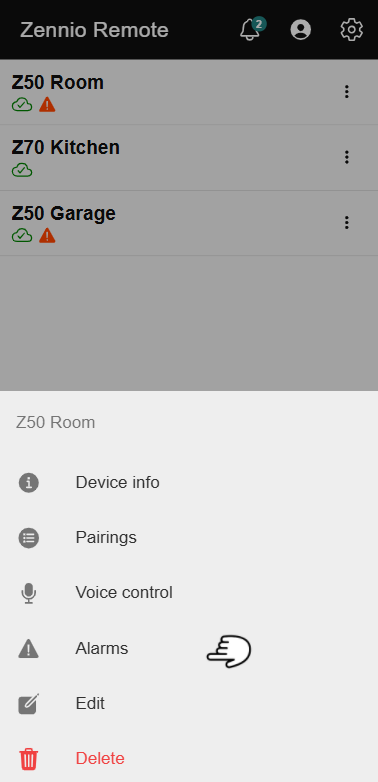
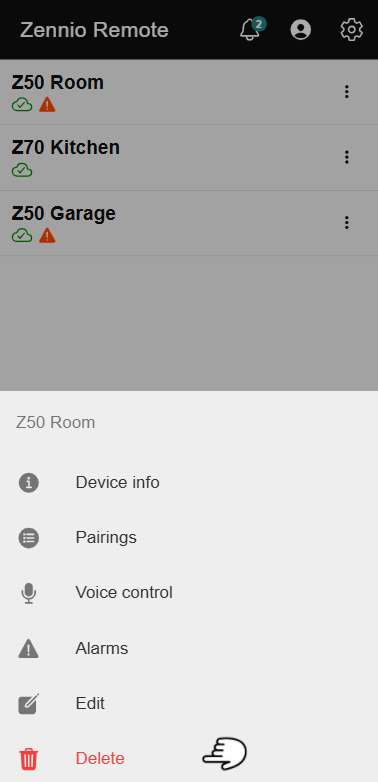
In the device list, the user must identify the device on which they want to obtain information. By clicking on the three dots located on the right of the device, several options will be displayed, including Device Info.
Pairings
This window allows viewing all pairings linked to a device, including information about user type, last use date, and status.
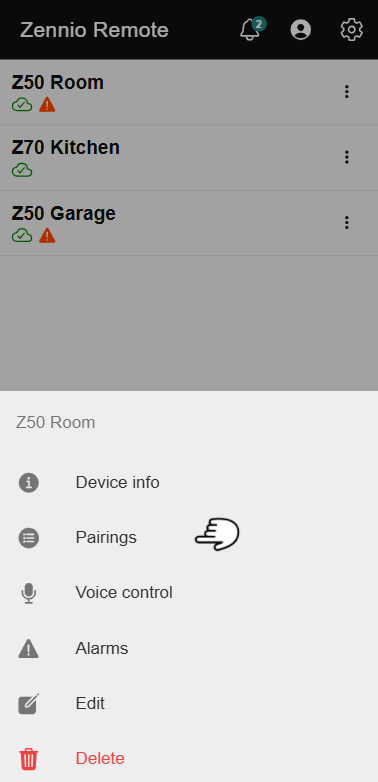
Accessing Pairings
In the device list, the user must identify the device for which they want to check the pairings.
By clicking on the three dots located on the right of the device, several options will be displayed, including Pairings.
This option is only available in the following cases:
- Devices other than Z41
- Users with admin or standard pairing type
- Not available for technician pairings or guest accounts
Viewing Pairings
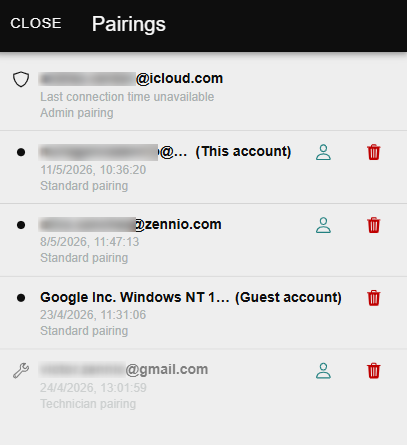
By selecting the Pairings option, a window will open showing the list of all pairings associated with the device.
For each pairing, the following information is displayed:
- Email or Guest Account: Email address of the account associated with the pairing or guest account identifier.
- Type: Indicates whether it is an admin, technician, or standard pairing. For admin pairings, the last connection information will not be available.
- Last use: Date and time of the last access to the device from that pairing.
Unauthorized technical pairings are shadowed.
Edit Pairing Type
To change the pairing type, the user must click on the icon located next to the current pairing type.
A dropdown menu will open where the new type (technician or standard) can be selected. The change will be applied automatically.
- Only changes between technician and standard types are allowed.
- Admin type pairings cannot be modified.
Delete Pairing
To delete a pairing, the user must click the icon located on the right side of the pairing.
A confirmation dialog will be displayed before proceeding with the deletion.
When deleting a pairing, the associated user will immediately lose access to the device.
- Admin type pairings cannot be deleted.
Voice Control
This window allows configuring and enabling voice commands on compatible devices. To use this functionality, it is important to ensure that:
- The device must be compatible with voice control.
- The corresponding license must be available.
Accessing Voice Control
In the device list, the user must identify the device on which they want to configure voice control. By clicking on the three dots located on the right of the device, several options will be displayed, including Voice Control.

By selecting the Voice Control option, a window will open where the voice control for the selected device can be configured.
Voice Control
Find more information about Voice Control. Creating devices, editing, deleting, and possible errors encountered.
Alarms
This window allows viewing, filtering, and managing all alarms associated with the configured devices.
Accessing Alarms
In the device list, the user must identify the device for which they want to check the active alarms. By clicking on the three dots located on the right of the device, several options will be displayed, including Alarms.
Viewing and Filtering Alarms
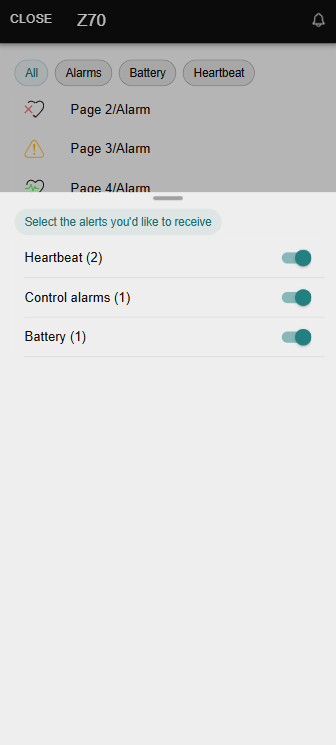
By selecting the Alarms option, a window will open showing the list of alarms associated with the device.
At the top of the window, different filters may appear, allowing the user to display only alarms of a specific type.
These filters are only available when the device has two or more types of alarms.
The available filters are:
- All: displays all alarms of the device.
- Alarms: displays only general alarms and control alarms.
- Battery: displays only battery-related alarms.
- Heartbeat: displays only communication (heartbeat) alarms.
Multiple alarm types are available starting from device version 4.3.
In earlier versions, only one alarm type exists, so filter chips will not be displayed.

The alarms list is sorted by status, showing active alarms first, followed by confirmed and deactivated alarms.
Types of Alarms
There are several types of alarms. Each alarm will include an icon representing its current status:
| Type | Icon | Description |
|---|---|---|
| Alarms | Alarm enabled | |
| Alarm disabled | ||
| Alarm confirmed | ||
| Battery | Full battery | |
| Low battery | ||
| Heartbeat | Signal lost | |
| Signal restored |
Notification Settings
Within this window, there is also the button.
By clicking it, a new window will open, allowing the user to enable or disable notifications for each available alarm type.
Each alarm type is displayed along with the total number of alarms in that category and a switch indicating whether notifications are enabled or not.
By default, all notifications are enabled.
- If notifications are enabled, alerts will be received when alarms of that type occur.
- If they are disabled, notifications for that alarm type will not be received.
The configuration is automatically saved when the window is closed.
Special Cases
Disconnected Device
If the device is not connected, it will not be possible to retrieve alarm information.
In this case, the following message will be displayed: Unable to obtain the status of the device alarms

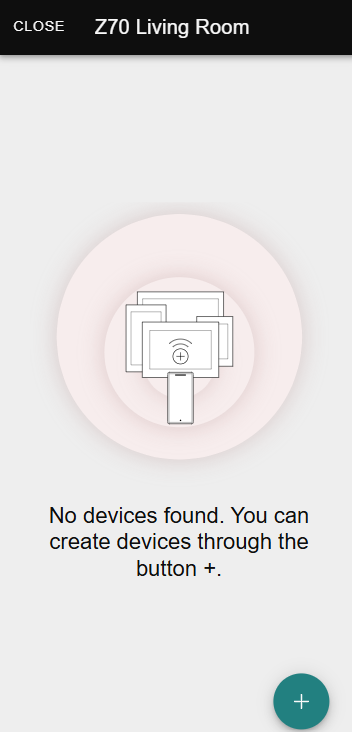
No Alarms
If the device is connected but has no alarms, the message There are no alarms will be displayed.
The edit button will remain disabled, as there are no alarms available to configure.

Edit Device
This window allows modifying the device's properties.
Accessing Edit Device
In the device list, the user must identify the device they wish to edit. By clicking on the three dots located on the right of the device, several options will be displayed, including Edit.
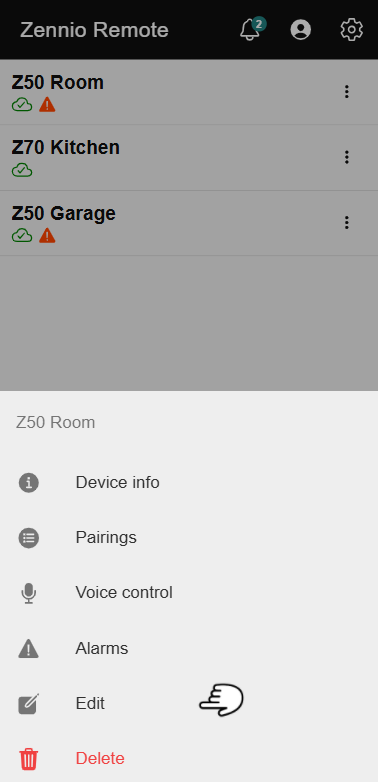
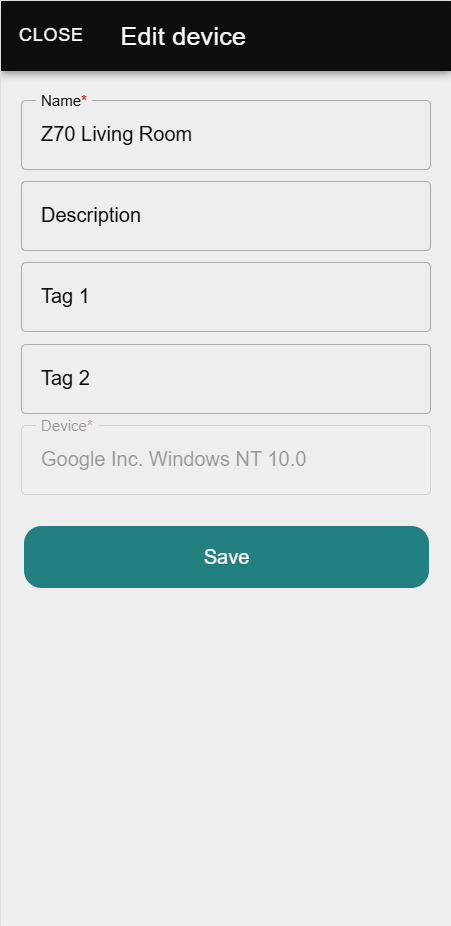
By selecting the Edit option, a window will open where the device's properties can be modified, including:
- Name: The device's custom identifier.
- Description: Additional details about the device.
- Tags: Keywords to facilitate search and categorization.
Delete Device
This option allows unlinking the device from the application.
Methods to Delete a Device
There are two main methods to delete a device from the application:
-
From the Management Menu:
- Select the Delete option.
- Confirm the action.
-
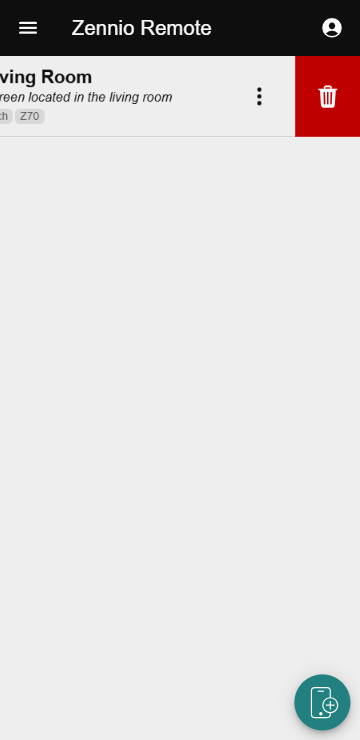
From the Device List:
- Swipe the device row to the left to display the delete icon.
- Click the icon and confirm.
Once deleted, the device will no longer be accessible from the application, although it may be re-paired in the future.